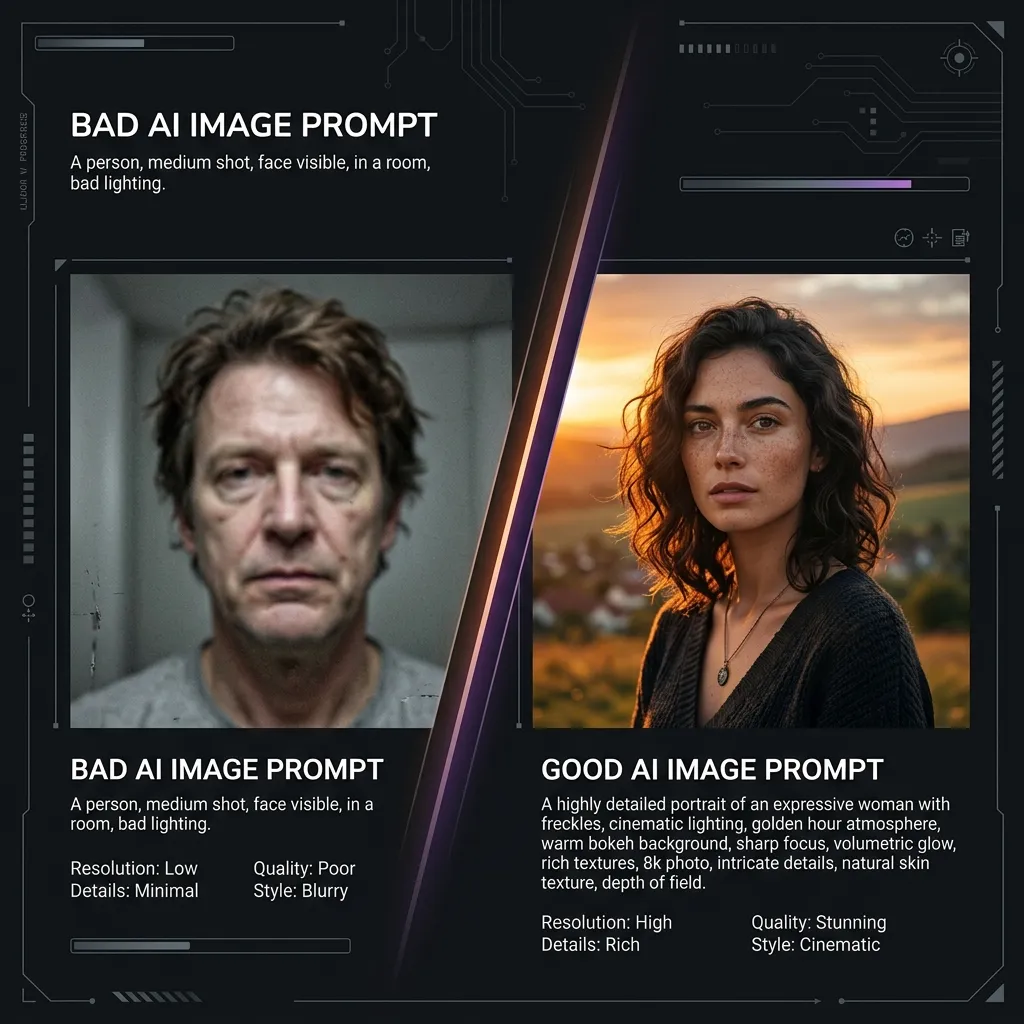
Prompt Engineering Tips for AI Images
“Learn practical prompt engineering techniques to create better AI images with Midjourney, Gemini, FLUX and Stable Diffusion.”
Prompt engineering for AI image generation has evolved from a trial-and-error hobby into a structured discipline with repeatable techniques. The gap between a beginner who gets inconsistent results and an experienced practitioner who produces reliable, high-quality images on demand is largely a matter of understanding and applying a set of core principles. This guide covers the most effective prompt engineering techniques for AI image generation in practical terms.
The Specificity Principle
The single most important principle in prompt engineering is specificity. Vague prompts produce vague outputs. When you write a beautiful landscape, you are asking the model to decide what kind of landscape, what time of day, what weather, what colour palette, what camera perspective, and what mood. The model makes all those decisions for you, and they may not align with your vision.
Replace abstract quality words with concrete visual descriptions. Instead of beautiful, describe what makes the scene beautiful: golden hour light warming a mountain meadow, wildflowers catching the last light, long shadows stretching toward camera, mist in the valley below. This gives the model specific instructions it can execute, rather than a subjective judgment it has to interpret.
The same principle applies to style descriptors. Cinematic is more specific than cool-looking, and anamorphic widescreen with teal-and-orange grade is more specific than cinematic. Specificity at every level of the prompt reduces the model's need to guess and increases the chance that the output matches your intention.
Controlling Composition
Composition is one of the most underspecified aspects of most prompts. If you do not tell the model how to frame the shot, it will default to a visually balanced, centered composition that is technically correct but rarely interesting. Experienced prompt engineers use photography and cinematography terminology to direct the framing precisely.
Shot type vocabulary gives you the most direct control over framing: extreme close-up means face fills the frame, close-up means head and shoulders, medium close-up means chest and above, medium shot means waist and above, wide shot means full figure, extreme wide shot means figure is small in the environment. Each creates a different emotional relationship between the viewer and the subject.
Camera angle vocabulary controls the power dynamic and perspective: eye-level is neutral and objective, low angle makes the subject appear powerful and dominant, high angle makes the subject appear small and vulnerable, bird's eye view is top-down and map-like, Dutch angle creates tension and unease through diagonal tilt, and point of view gives a first person perspective.
Depth of field instructions control focus and visual hierarchy. Specifying shallow depth of field or wide aperture at f/1.8 tells the model to blur the background and foreground, isolating the subject. Deep focus or small aperture at f/16 keeps everything sharp from foreground to background. These terms work reliably with most modern image generators.
Lighting Techniques That Actually Work
Lighting descriptions have an outsized impact on the mood and quality of AI-generated images. The reason is that lighting is one of the most systematically documented aspects of photography and film, which means models have extensive training data linking lighting descriptions to specific visual outcomes.
Natural lighting terms provide reliable results: golden hour means warm low-angle sunlight shortly after sunrise or before sunset, blue hour means cool soft indirect light just before sunrise or after sunset, overcast diffuse means flat even shadowless daylight, and harsh midday means high-contrast short shadows and bleached colours. Each produces a recognizably distinct look that models reproduce consistently.
Studio lighting setups also translate well: Rembrandt lighting creates a dramatic triangle of light on the shadow side of the face, butterfly lighting places the key light directly above the face and is flattering for portraits, split lighting puts half the face in shadow and is dramatic and high-contrast, and rim lighting comes from behind the subject to separate them from the background.
Practical light sources add naturalism and narrative: candlelight, firelight, neon signs, monitor glow, street lamps, lanterns. When you specify that a subject is lit by the glow of a laptop screen, you are giving the model both a light quality which is cool, directional, and low intensity, and a narrative context that enriches the image.
Style Reference Techniques
Style references are among the most powerful tools in prompt engineering. The most direct form is referencing a known artist, photographer, or filmmaker whose visual style you want to evoke. Lighting in the style of Roger Deakins will produce something different from lighting in the style of Gordon Willis, and both will be meaningfully different from generic cinematic lighting.
Film and photography era references are particularly useful because they imply a complete set of technical and aesthetic characteristics. 1970s colour film grain and saturation implies a specific palette, a warm colour cast, visible grain, and characteristic light-leak behaviour. 1990s grunge editorial photography implies desaturated colours, high contrast, available light, and imperfect composition.
Art movement references work similarly. Baroque implies dramatic chiaroscuro lighting, rich deep colours, and theatrical grandeur. Impressionist implies visible brushwork, atmospheric colour rather than sharp edges, and a focus on light quality over precise form. Brutalist implies raw concrete, monumental scale, austere minimalism, and geometric composition.
When combining style references, be intentional. Baroque portrait with cyberpunk neon lighting is a viable creative direction where the contradiction is the point. Impressionist landscape with photorealistic detail is contradictory in a way that confuses models because the two references make incompatible demands on texture and edge quality.
Iteration Strategies for Better Results
Effective prompt engineering is an iterative process, not a one-shot activity. The most common mistake beginners make is to write a long, complex prompt in a single attempt and then be disappointed when the result does not match their mental image. The professional approach is to start simple, evaluate honestly, and add specificity where the output falls short.
When a generated image is close to what you want but not quite right, identify the one thing that most needs improvement. Is the lighting wrong? Is the composition off? Is the colour grade not matching your vision? Address only that element in the next iteration. Changing multiple elements at once makes it impossible to know which change produced the improvement.
Use seed values when a platform provides them. A seed number locks the random starting point of the generation process, so adding or removing a single term from the prompt shows you exactly what effect that term has in isolation. This is the most reliable way to understand how individual prompt elements influence the output.
Build variation from a working base rather than starting from scratch for each new image. Once you have a prompt that produces the composition and style you want, save it as a template. Swap subject descriptions, change locations, and adjust the mood while keeping the structural and style instructions intact.
Quality Control Checklist
Before submitting a prompt for generation, run through this checklist. Does the prompt have a clear, specific subject? Does it include a context or environment? Does it specify a lighting setup? Does it reference a visual style or aesthetic? Does it specify the output format or composition? Does it include exclusions for common failure modes relevant to the subject? If any of these are missing, adding them is likely to improve the result.
After generating, evaluate the output against these same criteria. If the subject is wrong, refine the subject description. If the lighting is flat, add lighting instructions. If the style is generic, add more specific style references. This systematic evaluation turns each generation into a learning opportunity rather than a coin flip.